


#90daysofdevopschallenge
#day41
What is ELB in AWS?
AWS provides one feature ELB which is used to manage Load on AWS. It automatically distributes your incoming traffic across multiple targets like AWS EC2 Instances, containers, and IP addresses, in one or more Availability Zones. It also performs health checks on registered targets and automatically scales your load balancer capability to manage upcoming traffic.
Types Of ELB in AWS:
AWS provides 4 Types of Load balancers.
a) Application Load Balancer
b) Gateway Load Balancer
c) Network Load Balancer
d) Classic Load Balancer
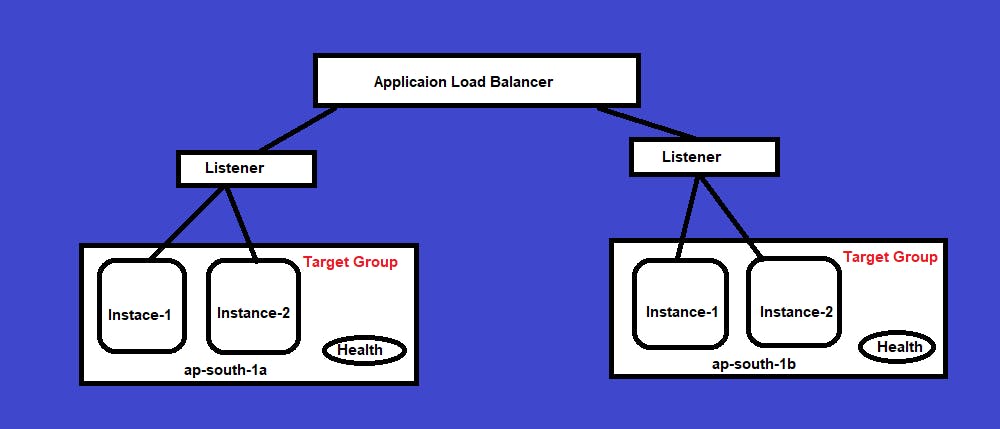
Application Load Balancer:
It helps to manage the application. Application Load Balancer behaves like a single point of contact for clients. It helps to increase the availability of your application. It automatically distributes load or upcoming traffic in multiple targets like EC2 instances in multiple availability zones. It works on the 7th layer of the OSI Model, called the Application Layer.
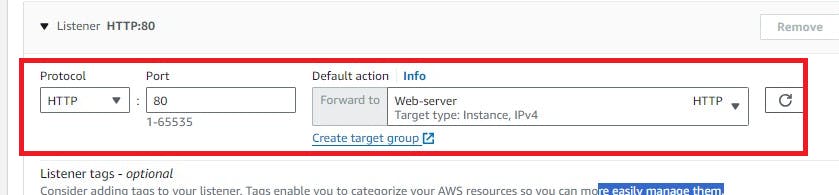
To create Application LoadBalancer you must create Target Group and Listener. You create up to 50 listeners at one time. By default, you have to create one listener. if you don't create a listener not able to receive traffic from clients.
Listeners: Listener is used to receive traffic from clients.
Target Group: The Target Group is created to distribute the Load. If you have 10 EC2 instances in one availability zone, it's good to have 10 EC2 instances in another availability zone to manage the application.
Gateway Load Balancer:
Gateway Load Balancer works on the third layer of the OSI model, called the network layer. It allows you to deploy, scale, and manage firewalls, and IP packets across all the ports. It is configured using routing tables.
Network Load Balancer:
Network Load Balancer works on the fourth layer of the OSI model. It is ideal for application that requires throughput and latency. It can handle millions of requests per second. After the load balancer receives a connection request, it selects a target from the target group for the default rule. It attempts to open a TCP connection to the selected target on the port specified in the listener configuration.
Classic Load Balancer:
Classic Load Balancer operates at layer 4 of the OSI model and is ideal for applications that require basic load-balancing features. It increases the fault tolerance of your application. You can add or remove ec2-instance without changing the flow of the application.
❄Tasks:
Task 1:
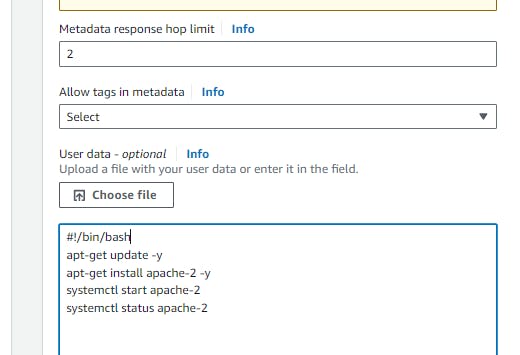
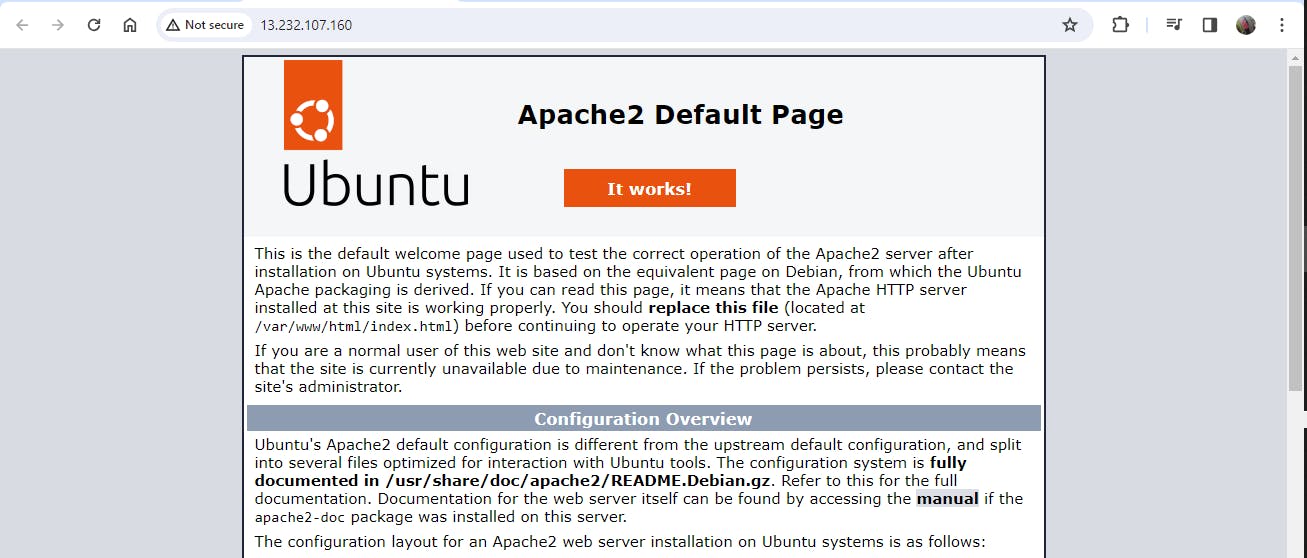
launch 2 EC2 instances with an Ubuntu AMI and use User Data to install the Apache Web Server. Modify the index.html file to include your name so that when your Apache server is hosted, it will display your name also do it for 2nd instance which includes " Hello!". Copy the public IP address of your EC2 instances. Open a web browser and paste the public IP address into the address bar. You should see a webpage displaying information about your PHP installation.
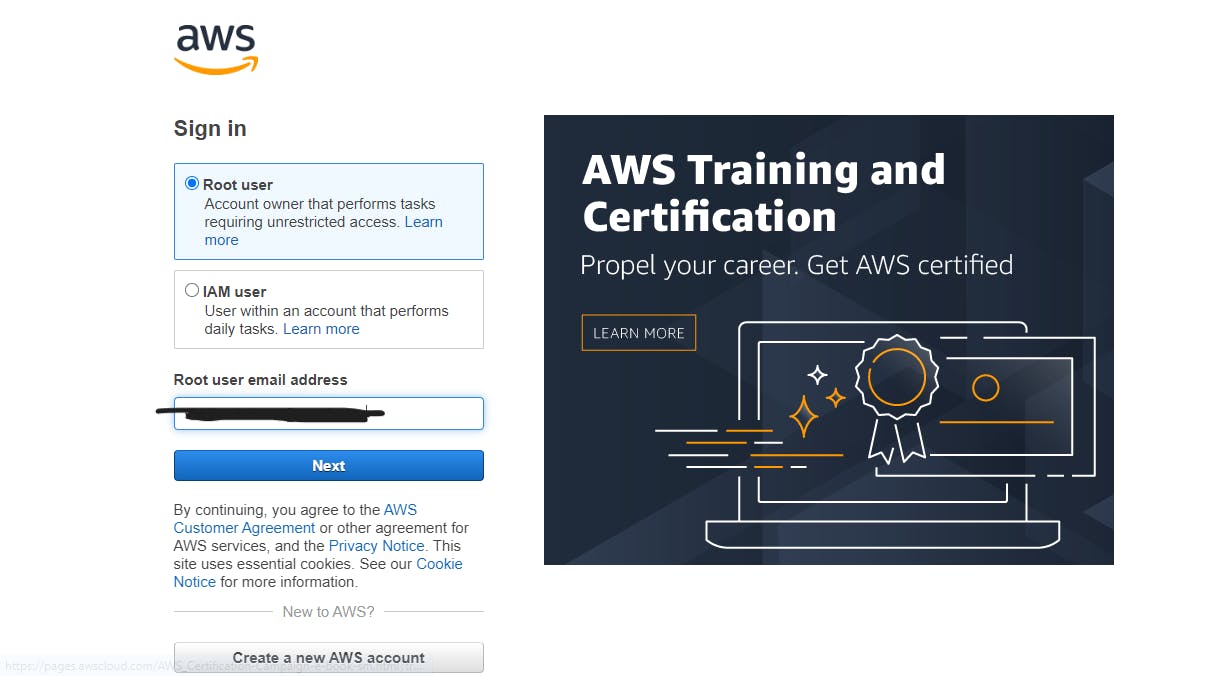
Step 1: Log in to AWS using the root or IAM users. (if you have permission to create EC2-instance as an IAM user)
Step 2: Click on "Launch Instance". Give name, key, and user-data scripts to install the Apache server on your ec2-instance.

After that Click on Launch Instances.
Note: The same steps follow to create web-server2.
Step 3: Verify that web-server1 and web-server2 are created successfully and accessible (by using Public-IP of EC2-instance).
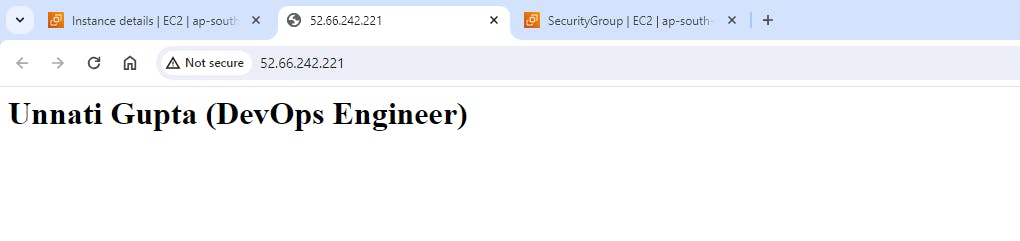
web-server1

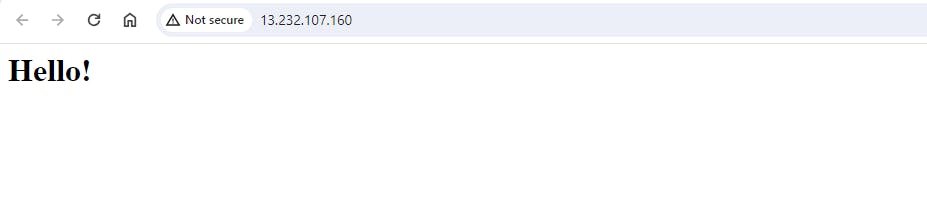
web-server2
Step 4: Now Access these instances and create a webpage. (Same create on web-server2).
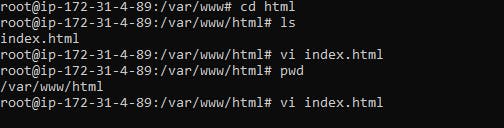
Step 5: Check all the changes are showing on the web pages.
web-server1:
web-server2:
Task 2:
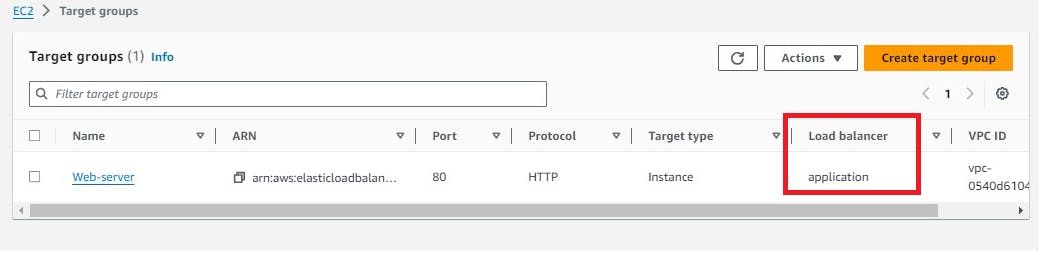
Create an Application Load Balancer (ALB) in EC2 using the AWS Management Console. Add EC2 instances that you launch in task-1 to the ALB as target groups. Verify that the ALB is working properly by checking the health status of the target instances and testing the load-balancing capabilities.
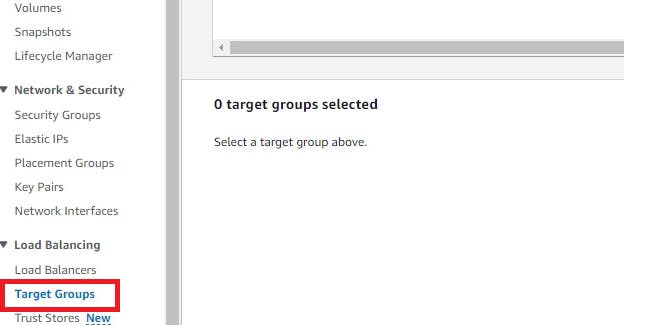
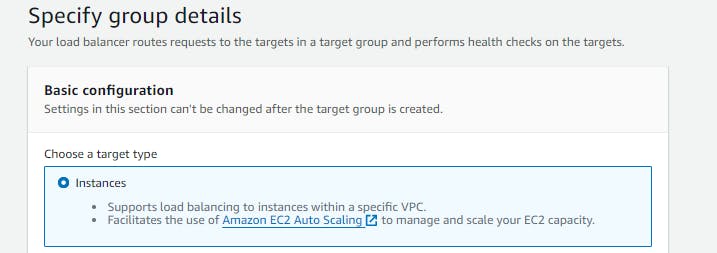
Before creating ALB, required to creation a Target Group.
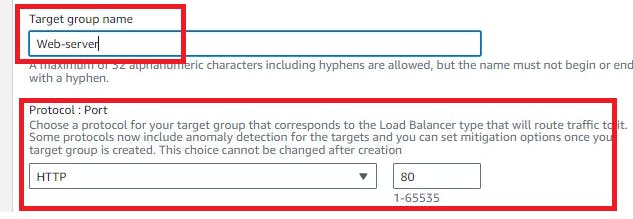
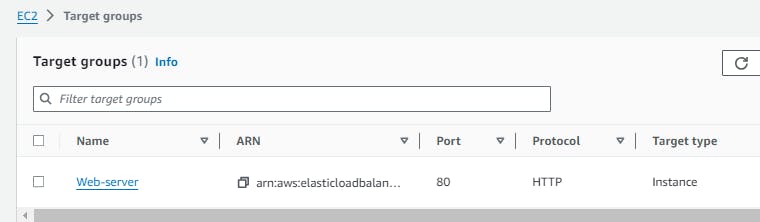
Step 1: Go to Target Group and click on Create Target Group. Provide the required information for creating it.
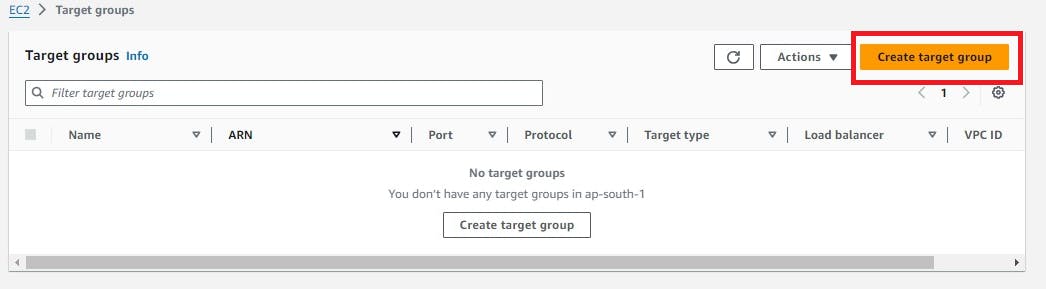
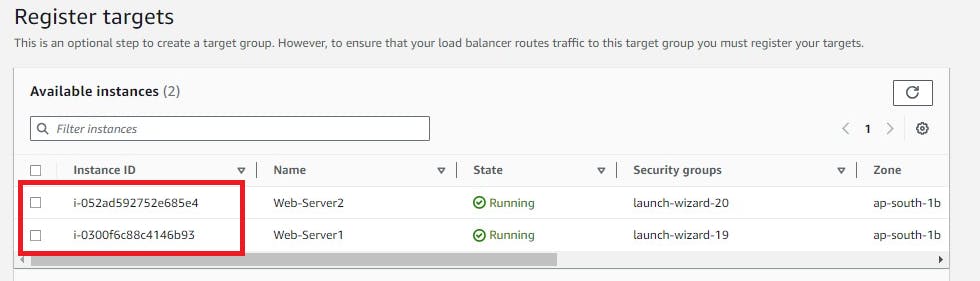
At the end Click on Create Target Group. and Verify Group Created successfully.
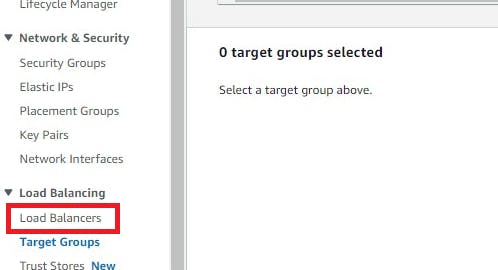
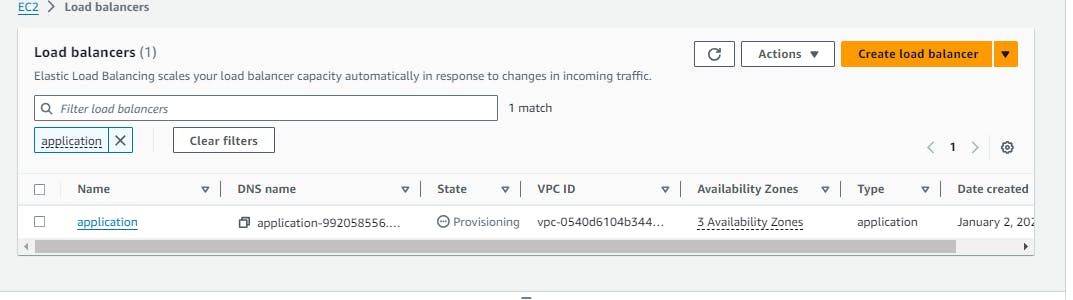
Now if you check Load Balancer is None. Let's create a Load balancer. Here we are going to create an ALB (Application Load Balancer).
Step 2: Click on Load Balancer and then go to the Create Load Balancer option.
Give a Name to your Load balancer and select availability zones.
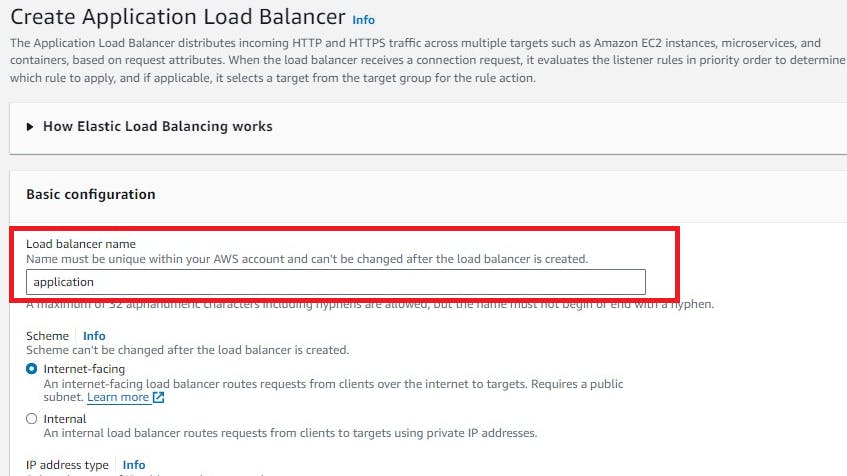
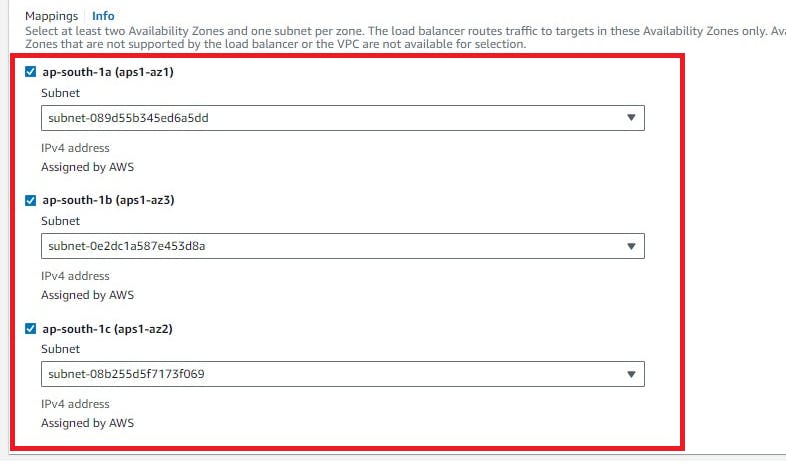
Click on Create Load Balancer at the end. Verify it's created successfully and connected to your target group.
Step 3: Now Access the application by using the DNS of the Load Balancer and Verify Load Balancer is working or not.
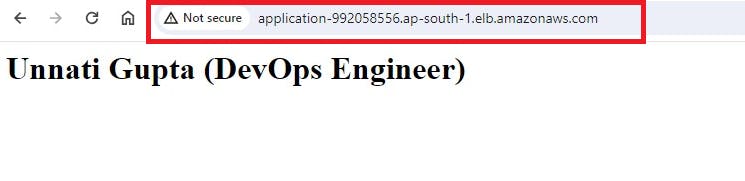

It's accessible Successfully. Congratulations your Load Balancer is working properly.
In the Next Article, we will look into IAM and AWS CLI.....
Thank you for giving your precious time to read this blog/article and if any suggestions or improvements are required on my blogs feel free to connect on LinkedIn Unnati Gupta. Happy Learning !!!